Enjoy a clear view of your stored items with Garage+ wire shelf - a versatile solution offering excellent ventilation and transparency. This shelf effortlessly clicks into place between two brackets, requiring no tools for installation. Customize its width to suit your needs, and enhance its appearance with the wire shelf composite trim for a stylish finish.
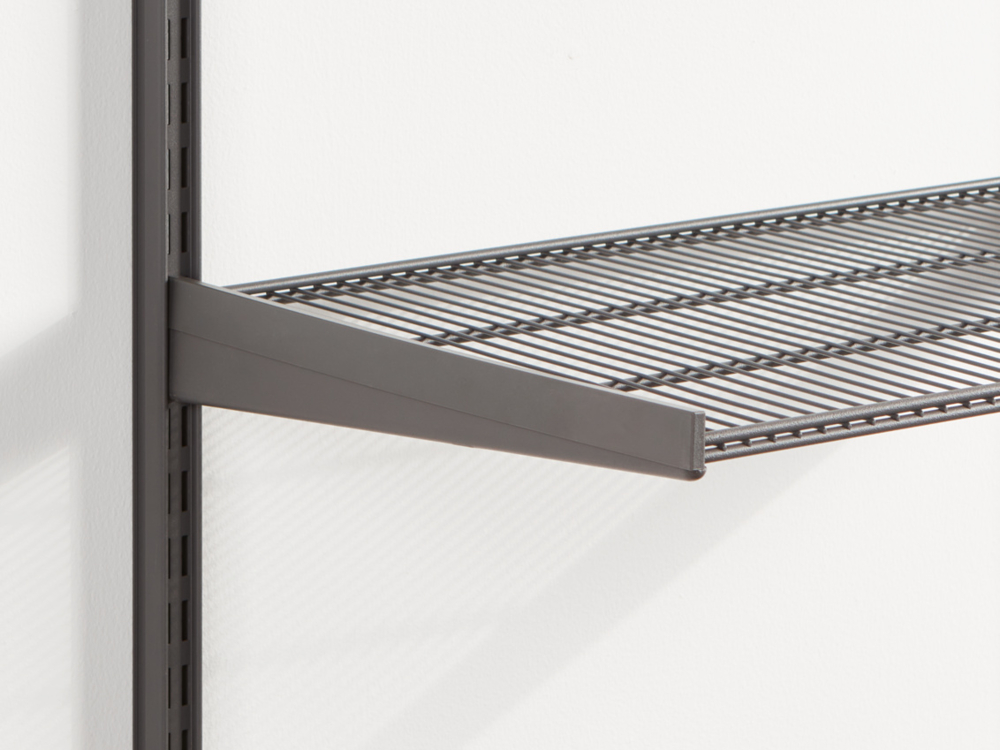
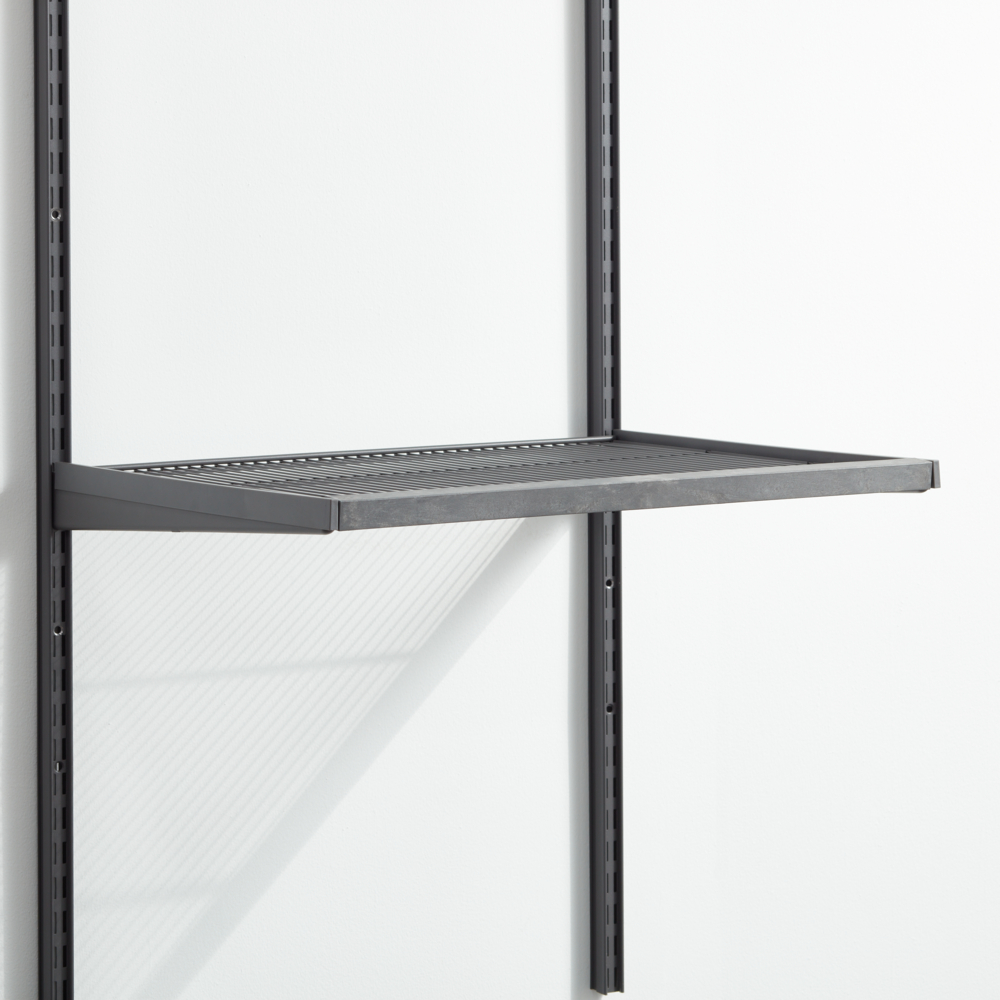
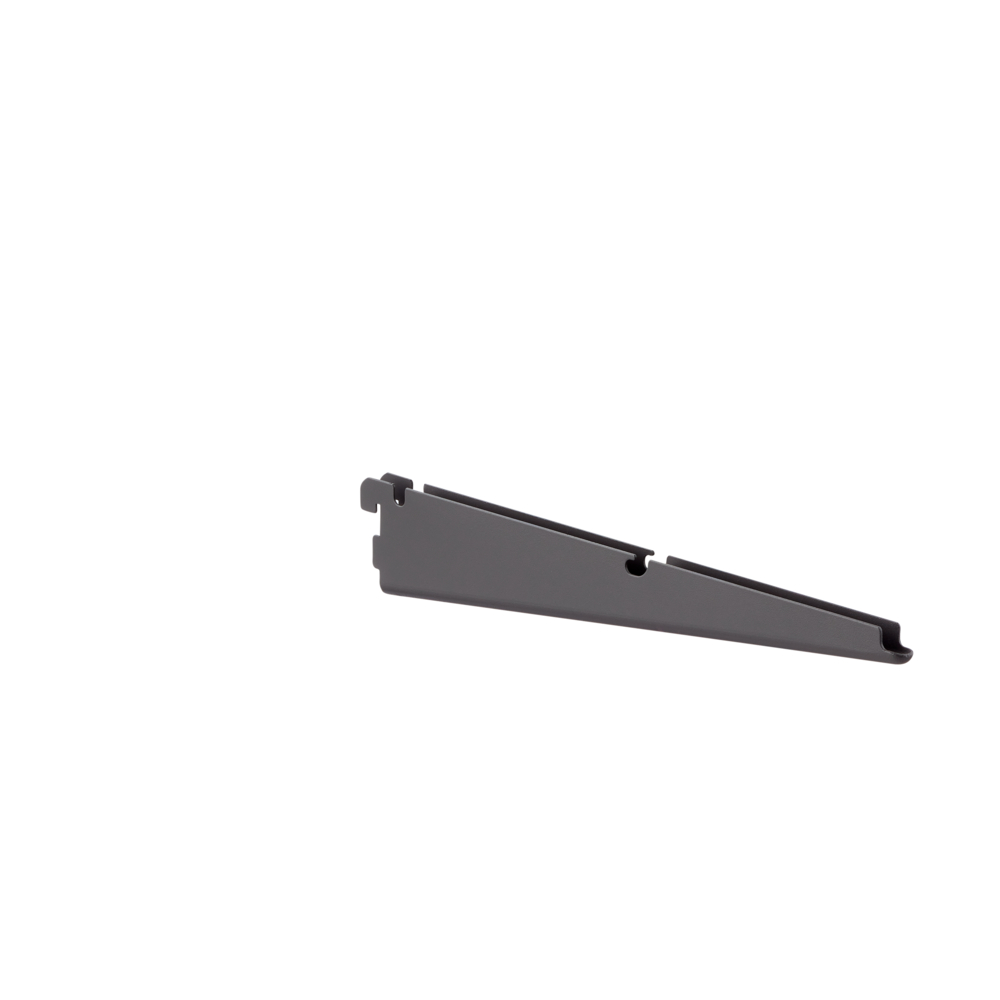
The wire shelf is a shelving option providing good ventilation and transparency for good overview. It easily clicks into place between two brackets, with no tools needed.
Wire shelves are made of steel wire. The double wire at the front and back adds strength without limiting accessibility. Thanks to the wire design, less dust gathers on the shelves, compared to a solid shelf.
The shelf can be cut to desired width, to achieve a tailored width of your solution.
Wire shelves click in place between two brackets in the corresponding depth. Other products such as shelf hook can be mounded under a wire shelf. The shelf can also be divided into sections with a wire shelf divider. The wire shelf can, in terms of width, be cut to size using a metal saw or angle grinder.
Colour:
Matte Grey (polyester colour) NCS S 7500-N, fine texture, gloss 5
Planning rules
<
Planning rules
When planning in Elfa Planner, the design tool will calculate the right amount of wire shelves. The design tool, will also help you configure the right widths in the solution, for example when planning a section that is not a standard section width.
* Two wire shelves can share the same bracket. Ideal if you like clean, straight lines or want continuous shelving over multiple sections.
* D:30 / 12"" shelves are perfect for narrow storage areas, such as in smaller garages. D:40 / 16"" and D:50 / 20"" can be used at the top of solutions to store luggage, large storage boxes and other bulky items.
* When planning your solution, bear in mind that an even spread of stored items across the shelves is preferable, evenly loading the entire solution. Do not place all of the weight on the bottom shelves. Plan for placing hang standards closer together when you aim for heavier loads.
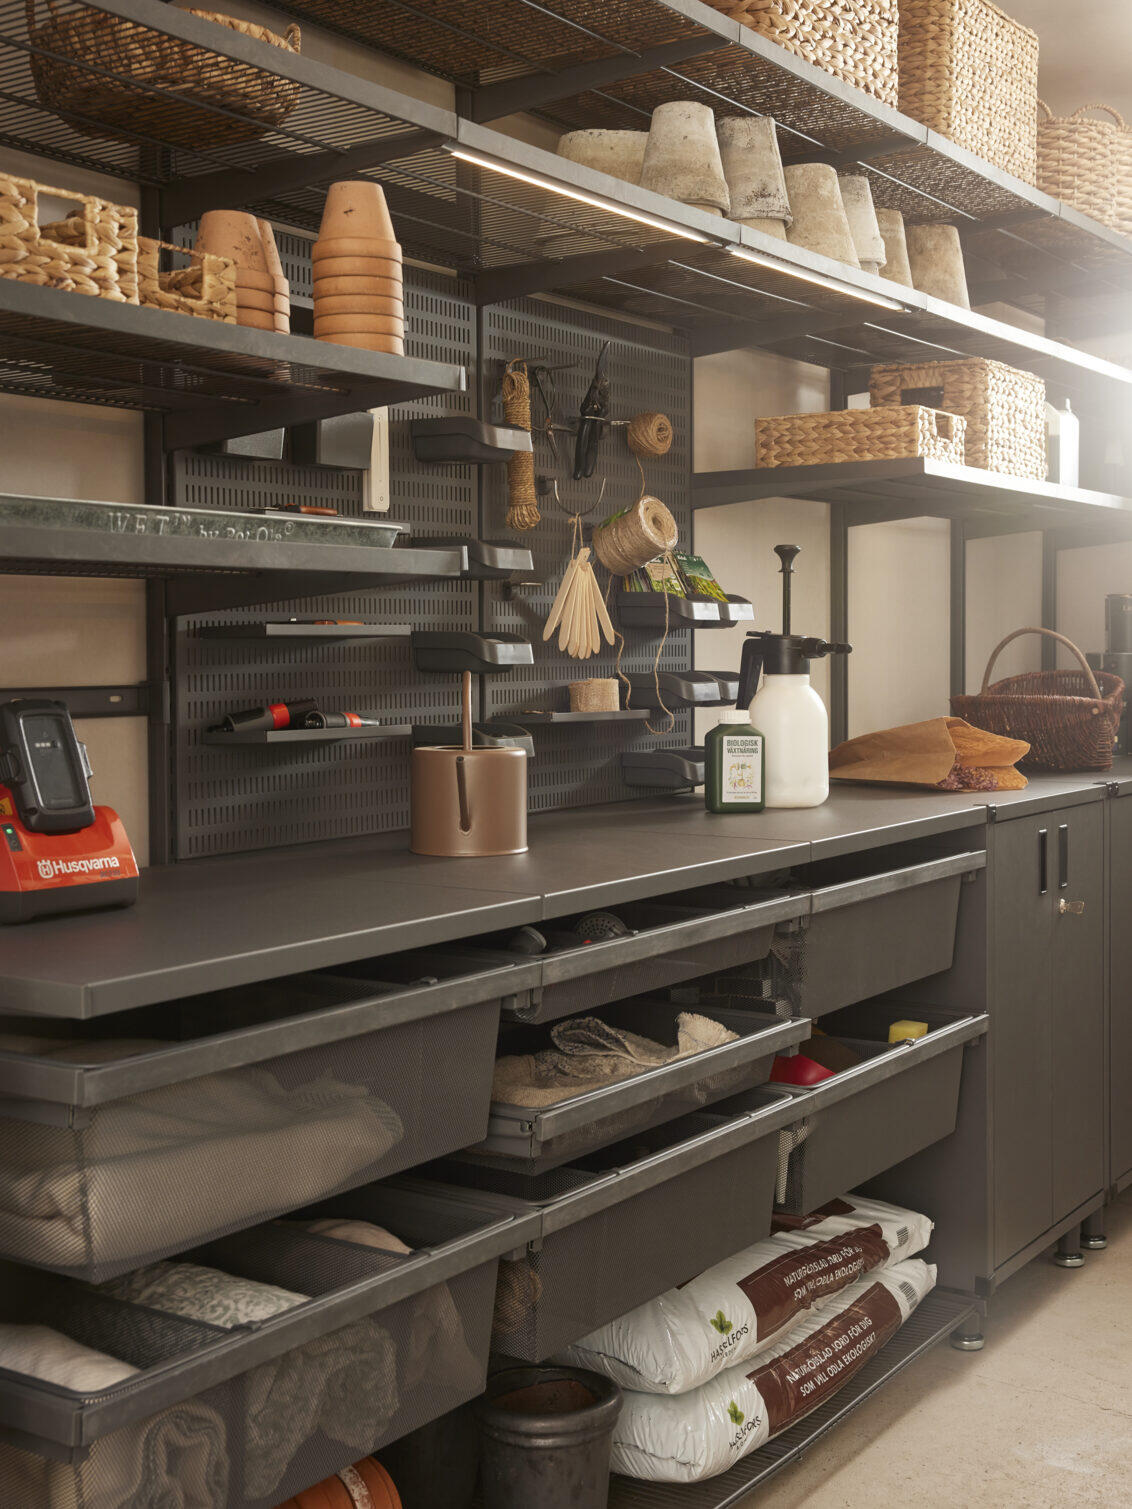
To enhance the look and match the finish with other Garage+ products (such as mesh drawers, where the gliding frame features a composite trim), choose to add a wire shelf composite trim.
Safety and care
<
Safety and care
Safety
Note! Do not place Elfa products in direct contact with water.
Care
Wipe clean with a cloth dampered with a mild cleaner. Wipe dry with a clean cloth.
Assembly Instructions
<
Assembly Instructions
You need the following to assemble: metal saw (if you need to cut the wire shelf).
Before you start: Mount the brackets. If needed, cut the wire shelf to the desired width.
A wire shelf has a top and a bottom. The middle support wire is connected to the bottom of the shelf.
Step 1: Place the bottom of the wire shelf over the notches in the bracket.
Step 2: Install the shelf with end wires inside the brackets. Lock the shelf into place by pressing down on the middle of the shelf and pushing toward the wall.
Step 3 (if you have a gliding frame sharing the same bracket): Attach the 4 "C-clips" (included in the gliding frame packaging). Snap them over the two middle crosswires in the gap next to the outer wires on the wire shelf.
To reposition a wire shelf after it’s been attached to the brackets: hold by the brackets, and lift the front of the shelf toward the ceiling and outward to release the entire unit from the hang standards.
Demount: To remove a wire shelf from a bracket while on the hang standards: hold the hang standard steady with one hand. Place the other hand at the back of the shelf. Pull up and forward to release.
Tip: If you have gliding drawer frames or perhaps a work surface in your solution, assemble these before installing the wire shelves. This to ensure that the CC measurement is correct - making the installation of the wire shelves easier.
Enjoy a clear view of your stored items with Garage+ wire shelf - a versatile solution offering excellent ventilation and transparency. This shelf effortlessly clicks into place between two brackets, requiring no tools for installation. Customize its width to suit your needs, and enhance its appearance with the wire shelf composite trim for a stylish finish.
Shelf that offers ventilation and a good overview of stored things.
Clicks easily into place between Garage+ brackets, requiring no tools.
Tailor the width to fit your storage needs, and add the composite trim for a refined appearance.
Color
Specification
<
Specification
Enjoy a clear view of your stored items with Garage+ wire shelf - a versatile solution offering excellent ventilation and transparency. This shelf effortlessly clicks into place between two brackets, requiring no tools for installation. Customize its width to suit your needs, and enhance its appearance with the wire shelf composite trim for a stylish finish.
The wire shelf is a shelving option providing good ventilation and transparency for good overview. It easily clicks into place between two brackets, with no tools needed.
Wire shelves are made of steel wire. The double wire at the front and back adds strength without limiting accessibility. Thanks to the wire design, less dust gathers on the shelves, compared to a solid shelf.
The shelf can be cut to desired width, to achieve a tailored width of your solution.
Wire shelves click in place between two brackets in the corresponding depth. Other products such as shelf hook can be mounded under a wire shelf. The shelf can also be divided into sections with a wire shelf divider. The wire shelf can, in terms of width, be cut to size using a metal saw or angle grinder.
Colour:
Matte Grey (polyester colour) NCS S 7500-N, fine texture, gloss 5
Planning rules
<
Planning rules
When planning in Elfa Planner, the design tool will calculate the right amount of wire shelves. The design tool, will also help you configure the right widths in the solution, for example when planning a section that is not a standard section width.
* Two wire shelves can share the same bracket. Ideal if you like clean, straight lines or want continuous shelving over multiple sections.
* D:30 / 12"" shelves are perfect for narrow storage areas, such as in smaller garages. D:40 / 16"" and D:50 / 20"" can be used at the top of solutions to store luggage, large storage boxes and other bulky items.
* When planning your solution, bear in mind that an even spread of stored items across the shelves is preferable, evenly loading the entire solution. Do not place all of the weight on the bottom shelves. Plan for placing hang standards closer together when you aim for heavier loads.
To enhance the look and match the finish with other Garage+ products (such as mesh drawers, where the gliding frame features a composite trim), choose to add a wire shelf composite trim.
Safety and care
<
Safety and care
Safety
Note! Do not place Elfa products in direct contact with water.
Care
Wipe clean with a cloth dampered with a mild cleaner. Wipe dry with a clean cloth.
Assembly Instructions
<
Assembly Instructions
You need the following to assemble: metal saw (if you need to cut the wire shelf).
Before you start: Mount the brackets. If needed, cut the wire shelf to the desired width.
A wire shelf has a top and a bottom. The middle support wire is connected to the bottom of the shelf.
Step 1: Place the bottom of the wire shelf over the notches in the bracket.
Step 2: Install the shelf with end wires inside the brackets. Lock the shelf into place by pressing down on the middle of the shelf and pushing toward the wall.
Step 3 (if you have a gliding frame sharing the same bracket): Attach the 4 "C-clips" (included in the gliding frame packaging). Snap them over the two middle crosswires in the gap next to the outer wires on the wire shelf.
To reposition a wire shelf after it’s been attached to the brackets: hold by the brackets, and lift the front of the shelf toward the ceiling and outward to release the entire unit from the hang standards.
Demount: To remove a wire shelf from a bracket while on the hang standards: hold the hang standard steady with one hand. Place the other hand at the back of the shelf. Pull up and forward to release.
Tip: If you have gliding drawer frames or perhaps a work surface in your solution, assemble these before installing the wire shelves. This to ensure that the CC measurement is correct - making the installation of the wire shelves easier.