Storage inspiration for every room – with smart solutions that combine style and function. Create a home where every surface becomes a storage opportunity.
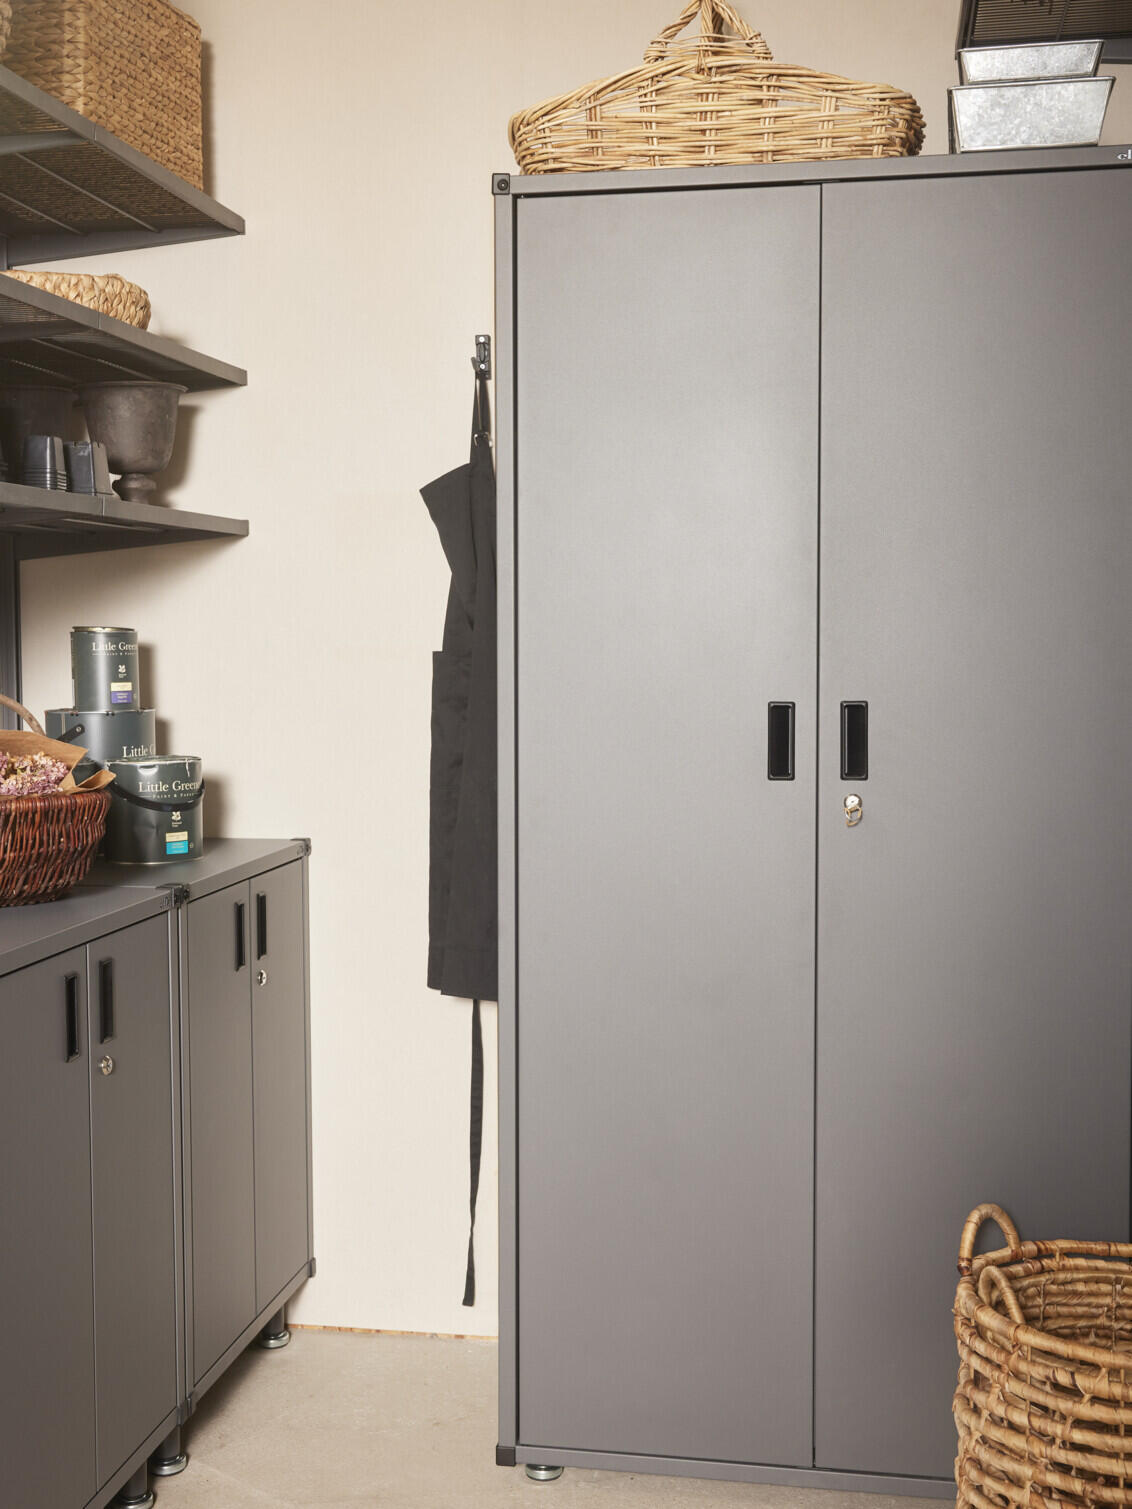
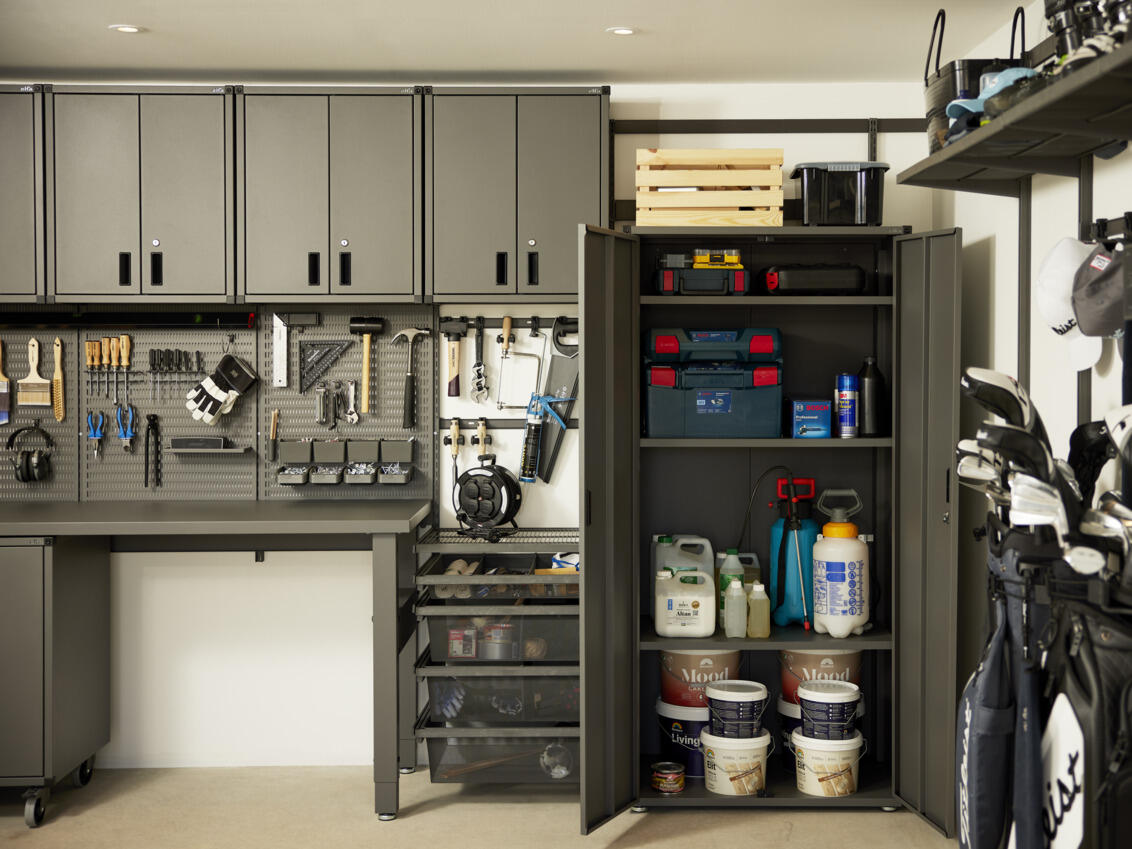
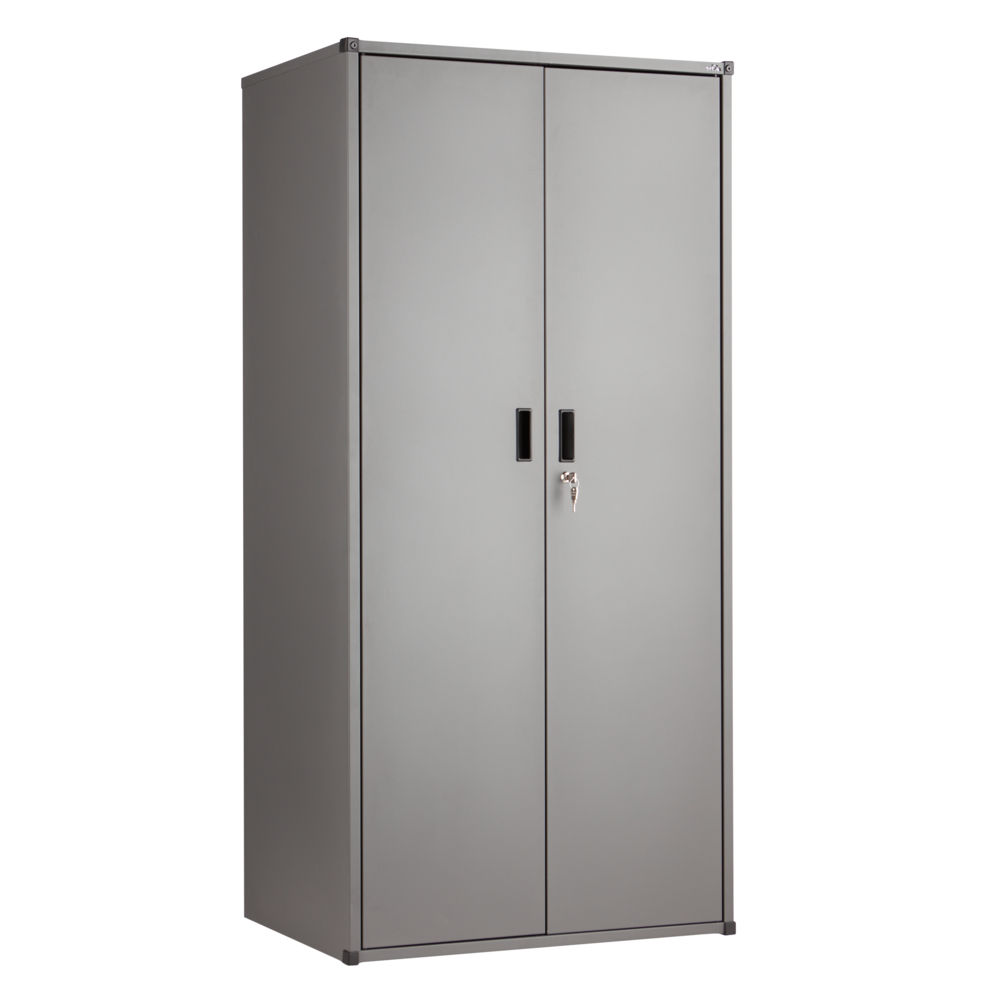
Improve your storage with Garage+ tall cabinet featuring corner protection in PP-plastic. Mount it in the system using the cabinet standard mounting kit or place it freestanding with adjustable feet. Complete with cabinet doors and 3 shelves.
A tall cabinet featuring corner protection in PP-plastic. Mounts in the system using the cabinet standard mounting kit or can be placed freestanding with adjustable feet. Add cabinet doors and shelves for a complete cabinet. Made from steel. Corner protection in plastic. Predrilled holes in the back to be able to secure to the wall (our recommendation, unless mounted in standards). The top of the cabinet can be used as a top shelf.
The tall cabinet includes the following items: * Tall Cabinet Frame (including an assembly kit with corner protection and needed hardware) * Tall Cabinet Doors (includes door stops and two keys) * Tall Cabinet Shelf (includes shelf clips in stainless steel) * Adjustable feet 0-25 mm (0 to 1”) If you want to mount attach the tall cabinet frame directly to the wall, use Cabinet Wall-Mounting Kit
Safety and care
<
Safety and care
Assembly Instructions
<
Assembly Instructions
IMPORTANT: This tall cabinet is not freestanding. To avoid tipping risk and accidents, the cabinet must always be anchored to the wall—either via the Elfa system or directly into wall studs/joists. The cabinet can carry substantial weight. Always ensure that your screws and plugs are suitable for your specific wall type (drywall, concrete, or wood). Note: Installing a tall cabinet requires two people.
Before you start: Make sure all hardware is included. Also find a flat, spacious area for assembly where neither the cabinet nor the floor can be damaged (preferably assemble on a large rug or on the cardboard packaging the cabinet was delivered in).
Before assembling the cabinet itself: Protect the surfaces! Assemble the cabinet on a soft underlay (e.g. the packaging) to avoid scratches on the cabinet or the floor.
Choose mounting method: A. Elfa system (top track + hang standard) with 2 support feet at the front When using the Elfa system: The standards must be installed with an exact 900 mm (35-7/16") center‑to‑center spacing. Secure the standards through the top holes so they cannot be lifted or slide. B. Standing on 4 adjustable feet with direct wall anchoring
Cabinet framework assembly (common to both methods) Step 1: Bottom & corners Place the corner protectors labeled BL (Bottom Left) and BR (Bottom Right) into the grooves in the cabinet base. Note the orientation of the notches. Step 2: Side panels Fasten the side panels to the base using screw B. Then secure the corner protectors to the side panels with screw B. Step 3: Back panel Join the two back panels using 3 angle brackets (F) and screw/nut (G). Step 4: Installation Position the back panels on the structure and secure them to the top edge of the side panels using screw C. Note: The back panel provides the cabinet’s stability. Step 5: Top Stand the framework upright. Place the corner protectors TL (Top Left) and TR (Top Right) under the cabinet top and fasten with screw B. Step 6: Locking Lay the cabinet back down on the floor with the rear side facing up. Secure the back panel and top firmly with 8 screws (C). Step 7: Details Stand the cabinet upright. Press in hole covers (D) into the top and bottom (2 pcs each). Secure the door stops (A) in both the top and bottom.
Choose your mounting method
Option A: Mounting in the Elfa system Step 1: Hang fittings Press the left and right hang fittings into the side panels. Secure them to the back panel. The hooks must protrude through the rear of the cabinet. Step 2: Support feet Lay the cabinet on its back and attach 2 cabinet adjustable feet at the front edge. Step 3: Hanging Two people required. Lift the cabinet and angle the hooks into the inner slots of the hang standards. Step 4: Adjustment Adjust the support feet until they carry the cabinet’s weight against the floor.
Option B: Mounting with 4 feet (direct to wall) Step 1: Feet Lay the cabinet on its back and install 4 adjustable feet. Step 2: Positioning Stand the cabinet upright and place it against the wall. Adjust the feet until the cabinet is perfectly level. Step 3: Marking Mark the screw holes on the wall through the holes inside the cabinet. Move the cabinet aside for drilling. Step 4: Drilling Use a 3 mm (1/8") drill bit for wooden studs. If no stud is present: Use a 10 mm (3/8") drill bit and install a drywall anchor/expander. Step 5: Securing Put the cabinet back in place and secure it to the wall using suitable screws.
Interior and doors Shelves Insert the shelf pins into the inner hole rows. Angle the shelves into position and press down to lock them in place. Doors Click the hinges into the mounting plates inside the cabinet. Start with the lower pin, then attach the upper one. Finish Attach the handles.
Press standard covers into the hang standards (for Elfa mounting) for a cleaner appearance. Check that the black corner protectors are securely in place.
Recommended price (Prices may vary between retailers)
945,40
Improve your storage with Garage+ tall cabinet featuring corner protection in PP-plastic. Mount it in the system using the cabinet standard mounting kit or place it freestanding with adjustable feet. Complete with cabinet doors and 3 shelves.
Color
Size
Width: 900 mm Depth: 531 mm
<
Select size
Width (mm): 900
Depth (mm): 531
Height: 1824
945,40
Specification
<
Specification
Improve your storage with Garage+ tall cabinet featuring corner protection in PP-plastic. Mount it in the system using the cabinet standard mounting kit or place it freestanding with adjustable feet. Complete with cabinet doors and 3 shelves.
A tall cabinet featuring corner protection in PP-plastic. Mounts in the system using the cabinet standard mounting kit or can be placed freestanding with adjustable feet. Add cabinet doors and shelves for a complete cabinet. Made from steel. Corner protection in plastic. Predrilled holes in the back to be able to secure to the wall (our recommendation, unless mounted in standards). The top of the cabinet can be used as a top shelf.
The tall cabinet includes the following items: * Tall Cabinet Frame (including an assembly kit with corner protection and needed hardware) * Tall Cabinet Doors (includes door stops and two keys) * Tall Cabinet Shelf (includes shelf clips in stainless steel) * Adjustable feet 0-25 mm (0 to 1”) If you want to mount attach the tall cabinet frame directly to the wall, use Cabinet Wall-Mounting Kit
Safety and care
<
Safety and care
Assembly Instructions
<
Assembly Instructions
IMPORTANT: This tall cabinet is not freestanding. To avoid tipping risk and accidents, the cabinet must always be anchored to the wall—either via the Elfa system or directly into wall studs/joists. The cabinet can carry substantial weight. Always ensure that your screws and plugs are suitable for your specific wall type (drywall, concrete, or wood). Note: Installing a tall cabinet requires two people.
Before you start: Make sure all hardware is included. Also find a flat, spacious area for assembly where neither the cabinet nor the floor can be damaged (preferably assemble on a large rug or on the cardboard packaging the cabinet was delivered in).
Before assembling the cabinet itself: Protect the surfaces! Assemble the cabinet on a soft underlay (e.g. the packaging) to avoid scratches on the cabinet or the floor.
Choose mounting method: A. Elfa system (top track + hang standard) with 2 support feet at the front When using the Elfa system: The standards must be installed with an exact 900 mm (35-7/16") center‑to‑center spacing. Secure the standards through the top holes so they cannot be lifted or slide. B. Standing on 4 adjustable feet with direct wall anchoring
Cabinet framework assembly (common to both methods) Step 1: Bottom & corners Place the corner protectors labeled BL (Bottom Left) and BR (Bottom Right) into the grooves in the cabinet base. Note the orientation of the notches. Step 2: Side panels Fasten the side panels to the base using screw B. Then secure the corner protectors to the side panels with screw B. Step 3: Back panel Join the two back panels using 3 angle brackets (F) and screw/nut (G). Step 4: Installation Position the back panels on the structure and secure them to the top edge of the side panels using screw C. Note: The back panel provides the cabinet’s stability. Step 5: Top Stand the framework upright. Place the corner protectors TL (Top Left) and TR (Top Right) under the cabinet top and fasten with screw B. Step 6: Locking Lay the cabinet back down on the floor with the rear side facing up. Secure the back panel and top firmly with 8 screws (C). Step 7: Details Stand the cabinet upright. Press in hole covers (D) into the top and bottom (2 pcs each). Secure the door stops (A) in both the top and bottom.
Choose your mounting method
Option A: Mounting in the Elfa system Step 1: Hang fittings Press the left and right hang fittings into the side panels. Secure them to the back panel. The hooks must protrude through the rear of the cabinet. Step 2: Support feet Lay the cabinet on its back and attach 2 cabinet adjustable feet at the front edge. Step 3: Hanging Two people required. Lift the cabinet and angle the hooks into the inner slots of the hang standards. Step 4: Adjustment Adjust the support feet until they carry the cabinet’s weight against the floor.
Option B: Mounting with 4 feet (direct to wall) Step 1: Feet Lay the cabinet on its back and install 4 adjustable feet. Step 2: Positioning Stand the cabinet upright and place it against the wall. Adjust the feet until the cabinet is perfectly level. Step 3: Marking Mark the screw holes on the wall through the holes inside the cabinet. Move the cabinet aside for drilling. Step 4: Drilling Use a 3 mm (1/8") drill bit for wooden studs. If no stud is present: Use a 10 mm (3/8") drill bit and install a drywall anchor/expander. Step 5: Securing Put the cabinet back in place and secure it to the wall using suitable screws.
Interior and doors Shelves Insert the shelf pins into the inner hole rows. Angle the shelves into position and press down to lock them in place. Doors Click the hinges into the mounting plates inside the cabinet. Start with the lower pin, then attach the upper one. Finish Attach the handles.
Press standard covers into the hang standards (for Elfa mounting) for a cleaner appearance. Check that the black corner protectors are securely in place.