Storage inspiration for every room – with smart solutions that combine style and function. Create a home where every surface becomes a storage opportunity.
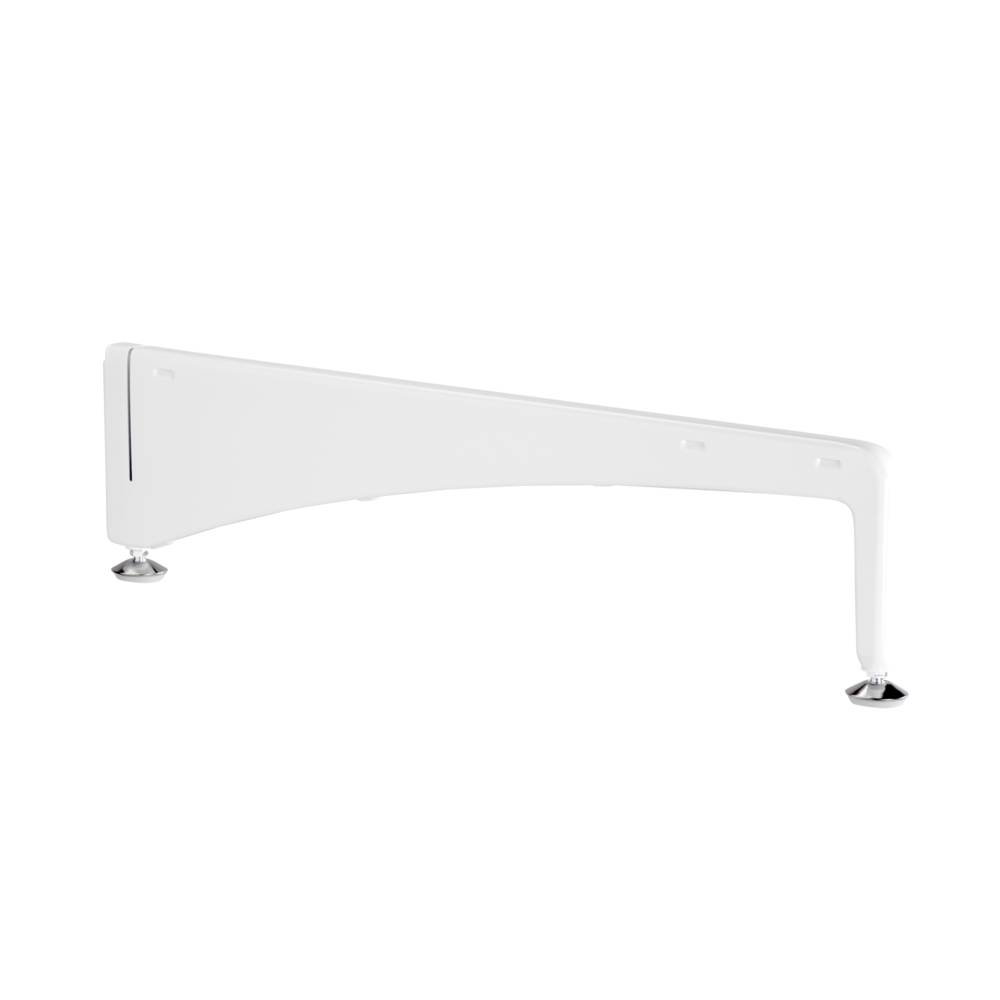
Create a stable freestanding storage solution with our foot for freestanding upright. The foot is designed to give you the freedom to create a freestanding storage solution with ease. With adjustable height for stability on uneven surfaces and included clips for securing a wire shelf, this foot is a great base for a freestanding system. Mounts easily under a freestanding upright.
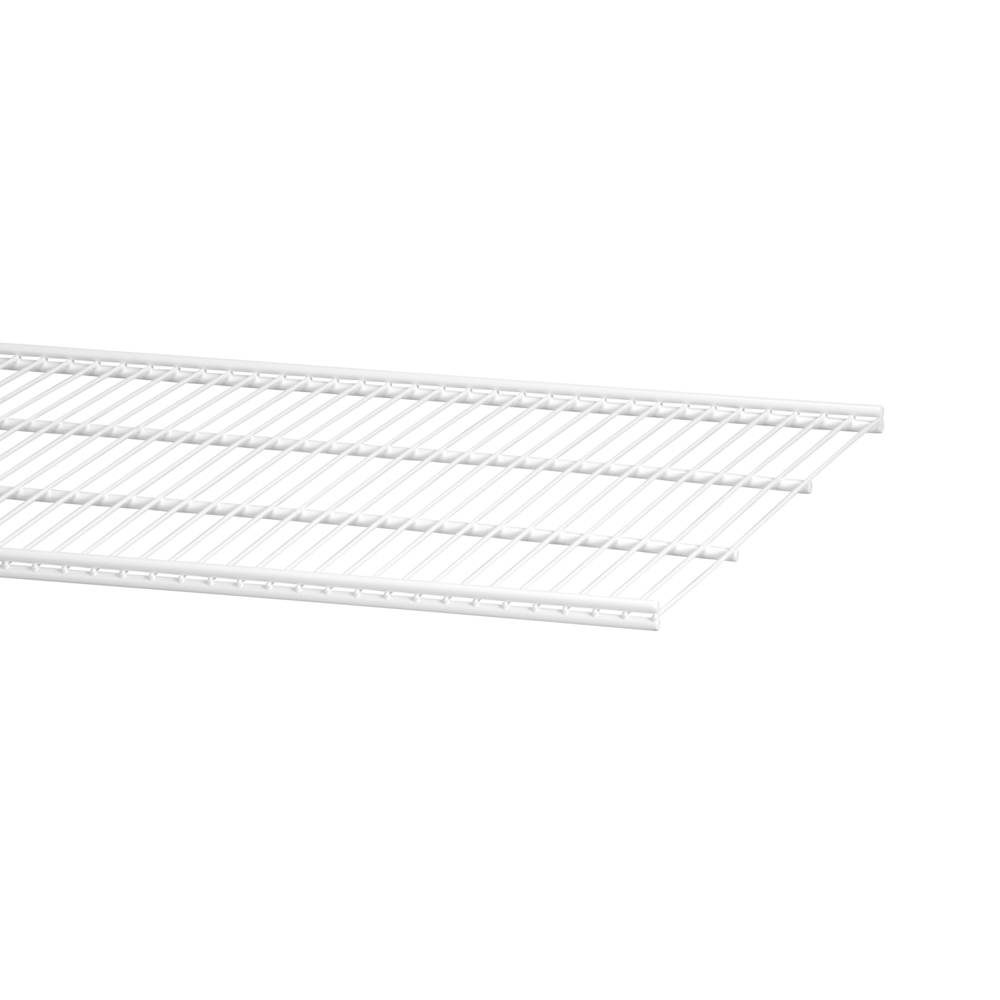
Feet for mounting freestanding uprights, when building a freestanding click-in system. Adjustable height to maintain stability despite uneven surface. Clips included to attach a wire shelf directly to the feet. Interior depth needs to be matched with the depth of the feet. Freestanding is available in W: 60 / 2' (determined by the width of the stabilization kit), which means that only products (wire shelf, wire shelf basket, gliding frame, gliding shoe shelf etc.) with W: 60 / 2' will fit into a freestanding W: 60 / 2' section. Metal colour: White, close to NCS S 0300-N, gloss around 85 Note: as the finish is a mixed powder, the NCS code/gloss isn’t exact.
Planning rules
<
Planning rules
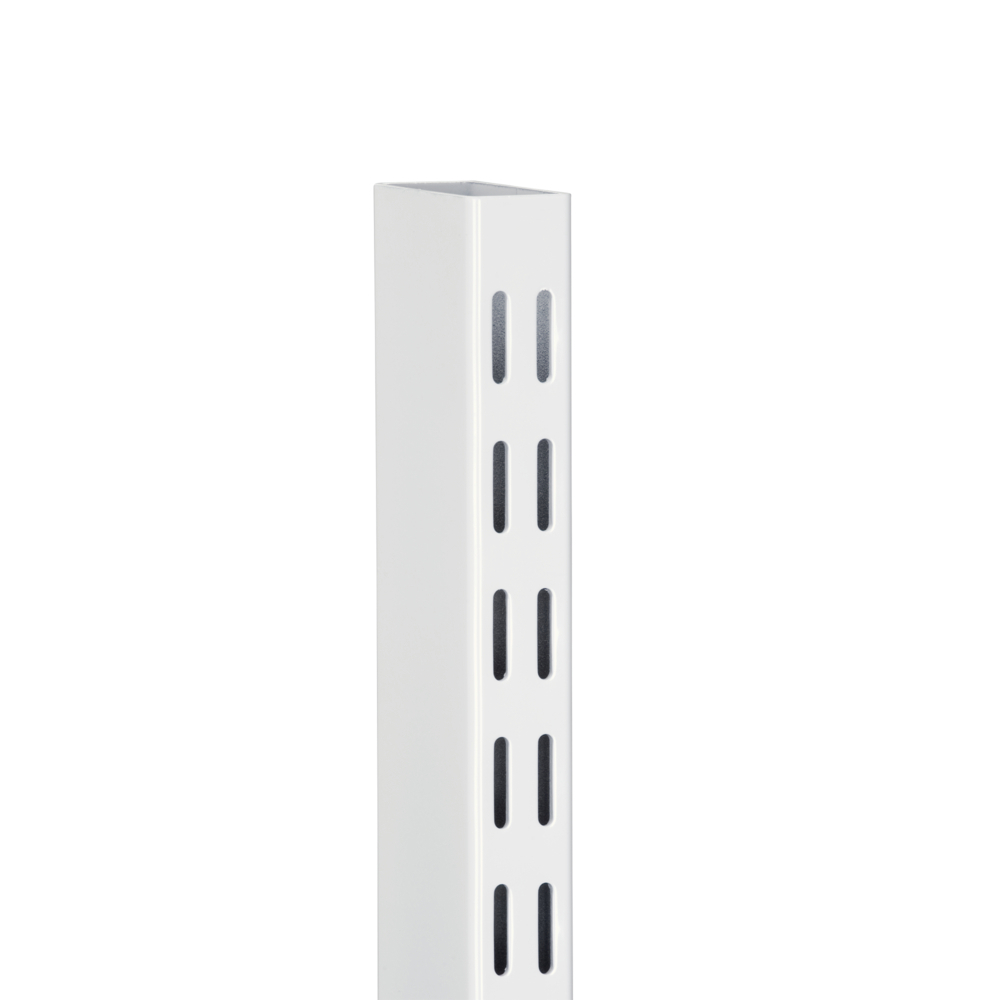
Freestanding is one of the mounting options within the click-in system. This option is ideal when you can’t – or don’t want to – mount your system directly on the wall e.g. when the wall can’t carry the weight, there is a window or when you want to leave the wall as it is. Freestanding is available in W: 60 / 2' (determined by the width of the stabilization kit), which means that only products (wire shelf, wire shelf basket, gliding frame, gliding shoe shelf etc.) with W: 60 / 2' will fit into a freestanding W: 60 / 2' section. Planning a single-sided solution: Freestanding can be planned as single-sided - the same methodology as for a top hung system, but with no direct attachment to the wall. As the freestanding uprights are thicker than hang standards, the solution builds 25 mm (1") more depth than a top hung solution. Also take into account that if you have (and intend to keep) a base/skirting board on the wall, this should also be taken into account when calculating system depth. Planning a double-sided solution: Freestanding can be planned as double-sided, as the freestanding uprights have slots on both sides. Which makes it perfect as a room divider. When planning a double-sided solution, you need one set of freestanding uprights and one stabilization kit, but two sets of feet for freestanding uprights. The depth of a double-sided solution (using 560 mm (22") foot for freestanding upright on each side) is 1170 mm (46-1/8"). The foot for freestanding can be adjusted 25 mm (1") in height to compensate for uneven floors.
Safety and care
<
Safety and care
Warranty & Quality The daily use of Elfa storage solutions requires both materials and craftsmanship of the highest quality. We develop products designed to last, and our 10-year warranty is a promise of exactly that. Elfa products are covered by a 10-year warranty from the date of purchase.
What is covered by the warranty? The warranty covers defects in materials and workmanship under normal residential use. It also covers functional defects in moving components such as wheels, soft-close mechanisms, and pull-out functions. This commercial warranty does not affect your statutory rights under applicable consumer protection legislation.
Warranty Provider The warranty provider is Elfa International AB, Sweden.
How to make a claim If there is an issue with your product, contact the retailer/store where you made your purchase and bring your receipt. The store will then inform Elfa. We at Elfa will do everything we can to provide a response to your claim as quickly as possible. However, it is important that you report any defect promptly, and therefore we recommend that you unpack and inspect your delivery immediately. If you cannot bring the product to the store, please take a photo showing the defect. Take one photo from approximately 1 metre away and one close-up photo with a nearby object (for example, a matchbox or pen) for size comparison in the case of surface damage.
How we help you In the event of an approved claim, Elfa undertakes, at no cost to you as a consumer, to repair or replace the defective product or component. Repair or replacement of individual parts is prioritised in order to extend the product's lifespan. If this is not possible, the product will be replaced with a new or equivalent item.
Limitations Naturally, we expect that you take good care of your Elfa products. A product that has been stored, assembled, or used incorrectly is not covered by the warranty. External damage and consequential damage occurring after your delivery has been accepted are not covered by the warranty.
Assembly Instructions
<
Assembly Instructions
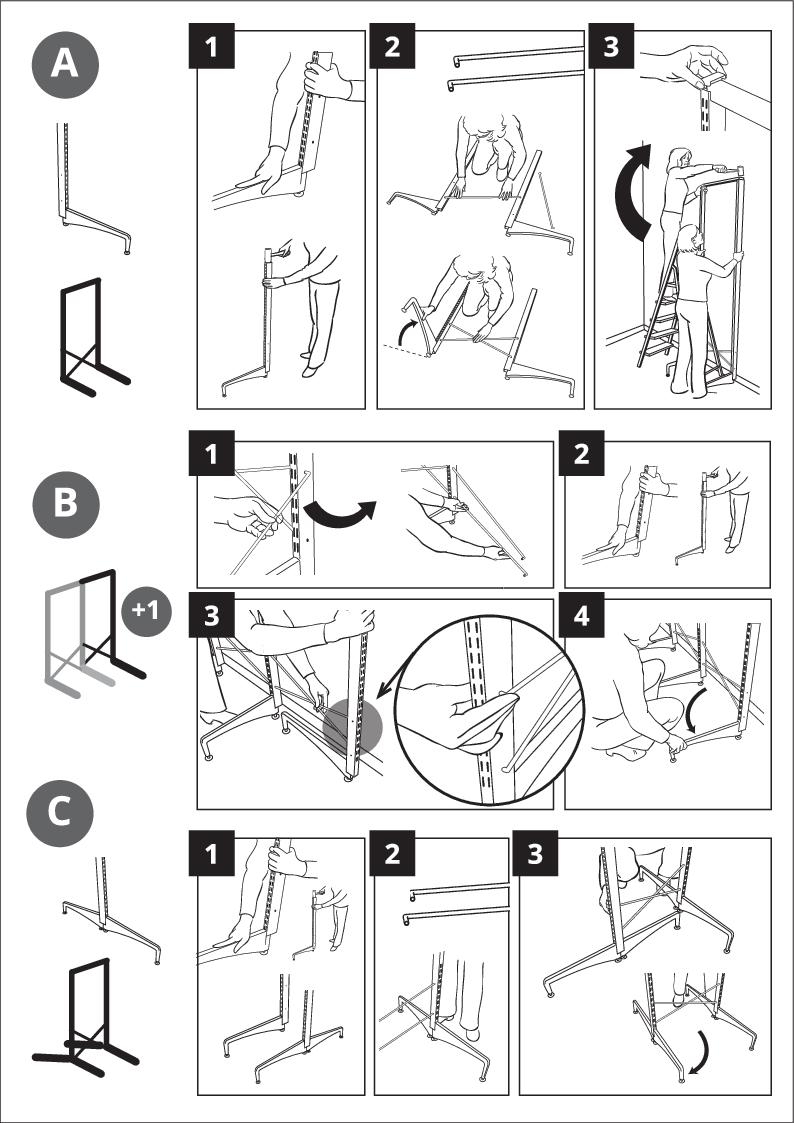
You need the following to assemble: Mallet. Start by mounting the feet. * Foot for freestanding upright: Screw into the freestanding upright. * Foot height extender: Attach the extender piece to the freestanding upright first and then screw the foot into the foot height extender. You can choose the desired solution height, depending on how deep you screw the foot into the foot height extender. (A) Assembling a single-sided solution: Step 1: Insert the freestanding uprights into the feet. The bottom of the upright is the part with the small holes on the side of the upright. Using a mallet, press down and knock the upright into the slot of the foot. Make sure the upright goes all the way down. Repeat the process with the second foot/upright. Step 2: Place the two pieces on the floor and insert the cross-braces in an “X” – using the holes on the sides of the uprights. Turn up the upright pieces, using one hand – where the other fixates the cross-braces. Then stand the unit upright. Step 3: Place the unit towards the wall – no more than 75 mm (3") from the wall. Secure the thicker stabilization bar between the uprights, using the mallet, ensuring they are completely into place. Alternate tapping the left and the right hand side. (B) When adding an additional section: Repeat the process with feet and upright – and then place the additional upright with the front of the feet facing the current section. Step 1: Attach the cross-braces in the hole. Step 2-3: Twist out the added upright so that the cross-braces lock. Place the end caps (and center caps if you have more than one section) on top of the uprights. If you are adding a wire shelf at the bottom (on top of the foot), use the special designed clips to attach the shelf on front and back. Make sure to finetune the height of the feet (with the included wrench) in order to have your system level. (C) Assembling a double-sided solution: Step 1: Assemble the foot to the upright (in the same way like for a single-sided solution) Then slide in and mount the “backside” foot with a leveler. Step 2: Repeat with the second upright. Step 3: Attach the cross-braces in an “X”, with the upright sections placed as a “T”. Then twist to make the two uprights/feet parallel.
Recommended price (Prices may vary between retailers)
36,80
Create a stable freestanding storage solution with our foot for freestanding upright. The foot is designed to give you the freedom to create a freestanding storage solution with ease. With adjustable height for stability on uneven surfaces and included clips for securing a wire shelf, this foot is a great base for a freestanding system. Mounts easily under a freestanding upright.
Easily transform any space into a click-in storage area without wall mounting.
Adjustable height ensures stability even on uneven floors.
Clips are included to fmake it possible to attack a wire shelf to the foot.
Create a stable freestanding storage solution with our foot for freestanding upright. The foot is designed to give you the freedom to create a freestanding storage solution with ease. With adjustable height for stability on uneven surfaces and included clips for securing a wire shelf, this foot is a great base for a freestanding system. Mounts easily under a freestanding upright.
Feet for mounting freestanding uprights, when building a freestanding click-in system. Adjustable height to maintain stability despite uneven surface. Clips included to attach a wire shelf directly to the feet. Interior depth needs to be matched with the depth of the feet. Freestanding is available in W: 60 / 2' (determined by the width of the stabilization kit), which means that only products (wire shelf, wire shelf basket, gliding frame, gliding shoe shelf etc.) with W: 60 / 2' will fit into a freestanding W: 60 / 2' section. Metal colour: White, close to NCS S 0300-N, gloss around 85 Note: as the finish is a mixed powder, the NCS code/gloss isn’t exact.
Planning rules
<
Planning rules
Freestanding is one of the mounting options within the click-in system. This option is ideal when you can’t – or don’t want to – mount your system directly on the wall e.g. when the wall can’t carry the weight, there is a window or when you want to leave the wall as it is. Freestanding is available in W: 60 / 2' (determined by the width of the stabilization kit), which means that only products (wire shelf, wire shelf basket, gliding frame, gliding shoe shelf etc.) with W: 60 / 2' will fit into a freestanding W: 60 / 2' section. Planning a single-sided solution: Freestanding can be planned as single-sided - the same methodology as for a top hung system, but with no direct attachment to the wall. As the freestanding uprights are thicker than hang standards, the solution builds 25 mm (1") more depth than a top hung solution. Also take into account that if you have (and intend to keep) a base/skirting board on the wall, this should also be taken into account when calculating system depth. Planning a double-sided solution: Freestanding can be planned as double-sided, as the freestanding uprights have slots on both sides. Which makes it perfect as a room divider. When planning a double-sided solution, you need one set of freestanding uprights and one stabilization kit, but two sets of feet for freestanding uprights. The depth of a double-sided solution (using 560 mm (22") foot for freestanding upright on each side) is 1170 mm (46-1/8"). The foot for freestanding can be adjusted 25 mm (1") in height to compensate for uneven floors.
Safety and care
<
Safety and care
Warranty & Quality The daily use of Elfa storage solutions requires both materials and craftsmanship of the highest quality. We develop products designed to last, and our 10-year warranty is a promise of exactly that. Elfa products are covered by a 10-year warranty from the date of purchase.
What is covered by the warranty? The warranty covers defects in materials and workmanship under normal residential use. It also covers functional defects in moving components such as wheels, soft-close mechanisms, and pull-out functions. This commercial warranty does not affect your statutory rights under applicable consumer protection legislation.
Warranty Provider The warranty provider is Elfa International AB, Sweden.
How to make a claim If there is an issue with your product, contact the retailer/store where you made your purchase and bring your receipt. The store will then inform Elfa. We at Elfa will do everything we can to provide a response to your claim as quickly as possible. However, it is important that you report any defect promptly, and therefore we recommend that you unpack and inspect your delivery immediately. If you cannot bring the product to the store, please take a photo showing the defect. Take one photo from approximately 1 metre away and one close-up photo with a nearby object (for example, a matchbox or pen) for size comparison in the case of surface damage.
How we help you In the event of an approved claim, Elfa undertakes, at no cost to you as a consumer, to repair or replace the defective product or component. Repair or replacement of individual parts is prioritised in order to extend the product's lifespan. If this is not possible, the product will be replaced with a new or equivalent item.
Limitations Naturally, we expect that you take good care of your Elfa products. A product that has been stored, assembled, or used incorrectly is not covered by the warranty. External damage and consequential damage occurring after your delivery has been accepted are not covered by the warranty.
Assembly Instructions
<
Assembly Instructions
You need the following to assemble: Mallet. Start by mounting the feet. * Foot for freestanding upright: Screw into the freestanding upright. * Foot height extender: Attach the extender piece to the freestanding upright first and then screw the foot into the foot height extender. You can choose the desired solution height, depending on how deep you screw the foot into the foot height extender. (A) Assembling a single-sided solution: Step 1: Insert the freestanding uprights into the feet. The bottom of the upright is the part with the small holes on the side of the upright. Using a mallet, press down and knock the upright into the slot of the foot. Make sure the upright goes all the way down. Repeat the process with the second foot/upright. Step 2: Place the two pieces on the floor and insert the cross-braces in an “X” – using the holes on the sides of the uprights. Turn up the upright pieces, using one hand – where the other fixates the cross-braces. Then stand the unit upright. Step 3: Place the unit towards the wall – no more than 75 mm (3") from the wall. Secure the thicker stabilization bar between the uprights, using the mallet, ensuring they are completely into place. Alternate tapping the left and the right hand side. (B) When adding an additional section: Repeat the process with feet and upright – and then place the additional upright with the front of the feet facing the current section. Step 1: Attach the cross-braces in the hole. Step 2-3: Twist out the added upright so that the cross-braces lock. Place the end caps (and center caps if you have more than one section) on top of the uprights. If you are adding a wire shelf at the bottom (on top of the foot), use the special designed clips to attach the shelf on front and back. Make sure to finetune the height of the feet (with the included wrench) in order to have your system level. (C) Assembling a double-sided solution: Step 1: Assemble the foot to the upright (in the same way like for a single-sided solution) Then slide in and mount the “backside” foot with a leveler. Step 2: Repeat with the second upright. Step 3: Attach the cross-braces in an “X”, with the upright sections placed as a “T”. Then twist to make the two uprights/feet parallel.