Storage inspiration for every room – with smart solutions that combine style and function. Create a home where every surface becomes a storage opportunity.
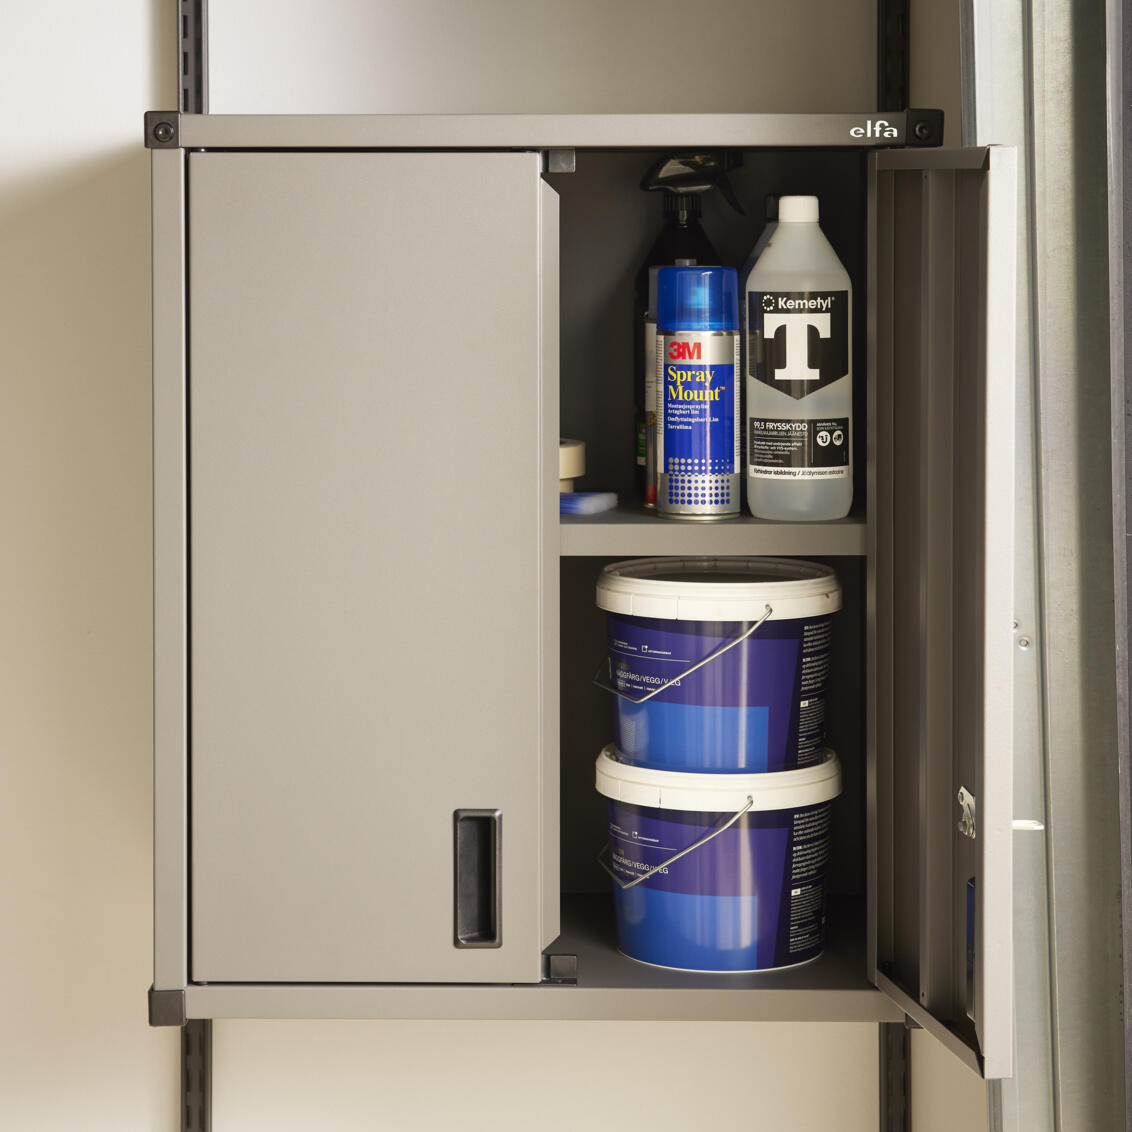
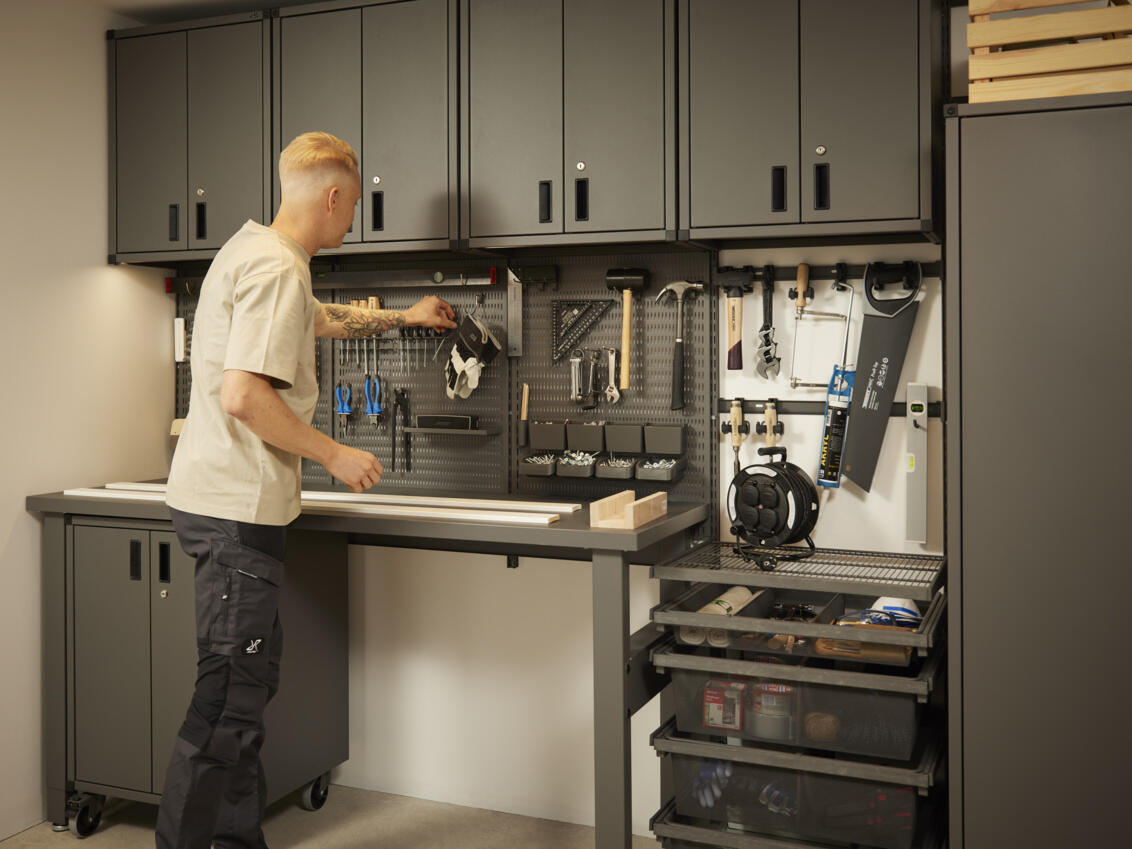
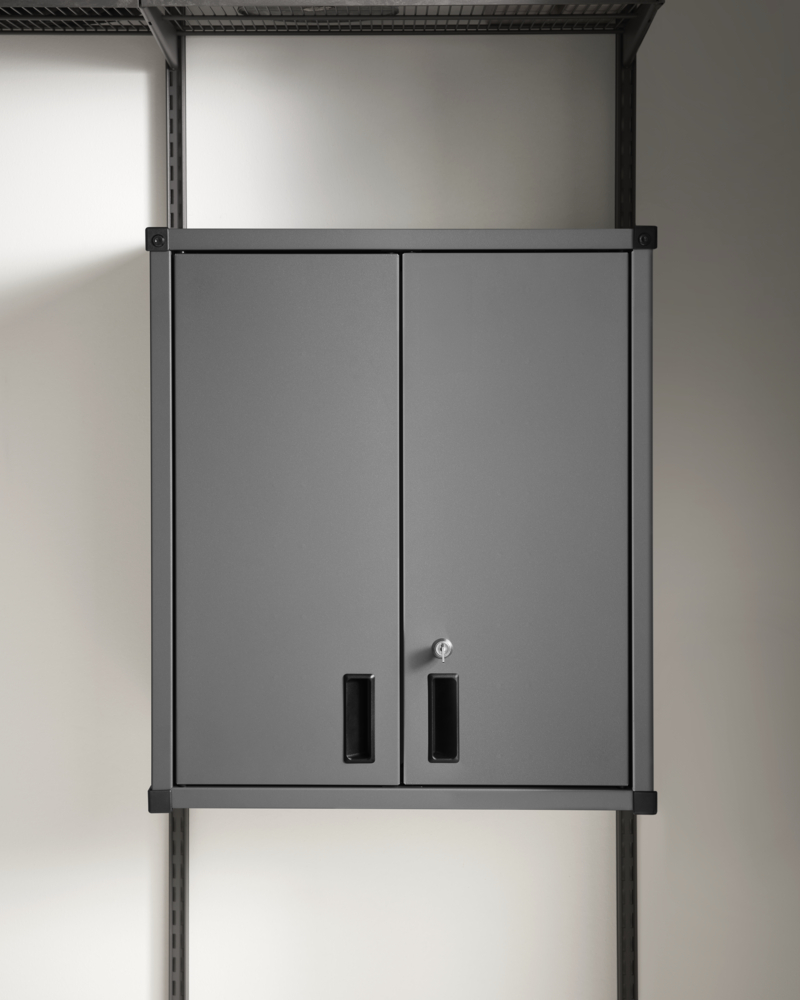
Elevate your storage with the robust steel Upper cabinet featuring corner protection in PP-plastic. Mount it easily in Garage+ standards or mount directly onto the wall using the Garage+ upper cabinet wall-mounting kit. This kit contains frame, cabinet doors and a shelf for a versatile and organized space.
A kit for creating an upper cabinet. Mounts in a Garage+ standard or directly on the wall using mounting kit.
The package includes cabinet frame, doors and a shelf.
Components in high-quality steel.
Safety and care
<
Safety and care
Safety
Note! Do not place Elfa products in direct contact with water.
Care
Wipe clean with a cloth dampered with a mild cleaner. Wipe dry with a clean cloth.
Assembly Instructions
<
Assembly Instructions
IMPORTANT: This cabinet must always be properly anchored to the wall to prevent accidents, either via the Elfa system or directly into wall studs. Always ensure that your screws and wall anchors are appropriate for your specific wall type (drywall, concrete, or wood).
Before you begin: Ensure all hardware is included. Find a flat surface for assembly where you will not damage the cabinet or the floor (we recommend assembling on a rug or the cardboard box the cabinet was delivered in).
Choose Installation Method:
A. Elfa System: Top track + Hang standards.
Note: The standards must be placed with an exact 600 mm (23 5/8") CC-measurement (center to center). Secure the standards through the top holes so they cannot be lifted or slide.
B. Direct Wall Mounting: Using a separate Cabinet Wall Mounting Kit.
Assembling the Frame (Common for both methods)
Step 1: Side Panels: Screw the left and right side panels to the cabinet bottom using 2 screws (B).
Step 2: Lower Corner Protectors: Place corner protectors BL (left) and BR (right) on the side panels and secure with 2 screws (B). Note the direction of the notches.
Step 3: Back Panel: Place the back panel on the unit and attach it to the top edge of the side panels using 2 screws (C).
Step 4: Cabinet Top: Stand the unit up. Position the corner brackets under the cabinet top (verify the notch direction in the brackets) and place the top onto the unit.
Step 5: Upper Corner Protectors: Install corner protectors TL (left) and TR (right) on the cabinet top using 2 screws (B).
Step 6: Locking: Lay the cabinet down with the back facing up. Secure the back panel and the top firmly with 6 screws (C).
Step 7: Final Details: Stand the cabinet up. Press 4 hole plugs (D) into the top and bottom. Screw the door stops (A) into both the top and bottom.
Choose Your Mounting Method:
Option A: Mounting with Elfa System (Hanging Standards)
1. Brackets: Press the left and right mounting brackets into the side panels and secure them to the back panel with 2 screws (E). The hooks should protrude through the back of the cabinet.
2. Standards: Ensure that the hang standards are fully secured to the wall before mounting.
3. Hanging: Lift the cabinet and tilt the hooks into the inner slots of the hang standards.
Option B: Direct Wall Mounting
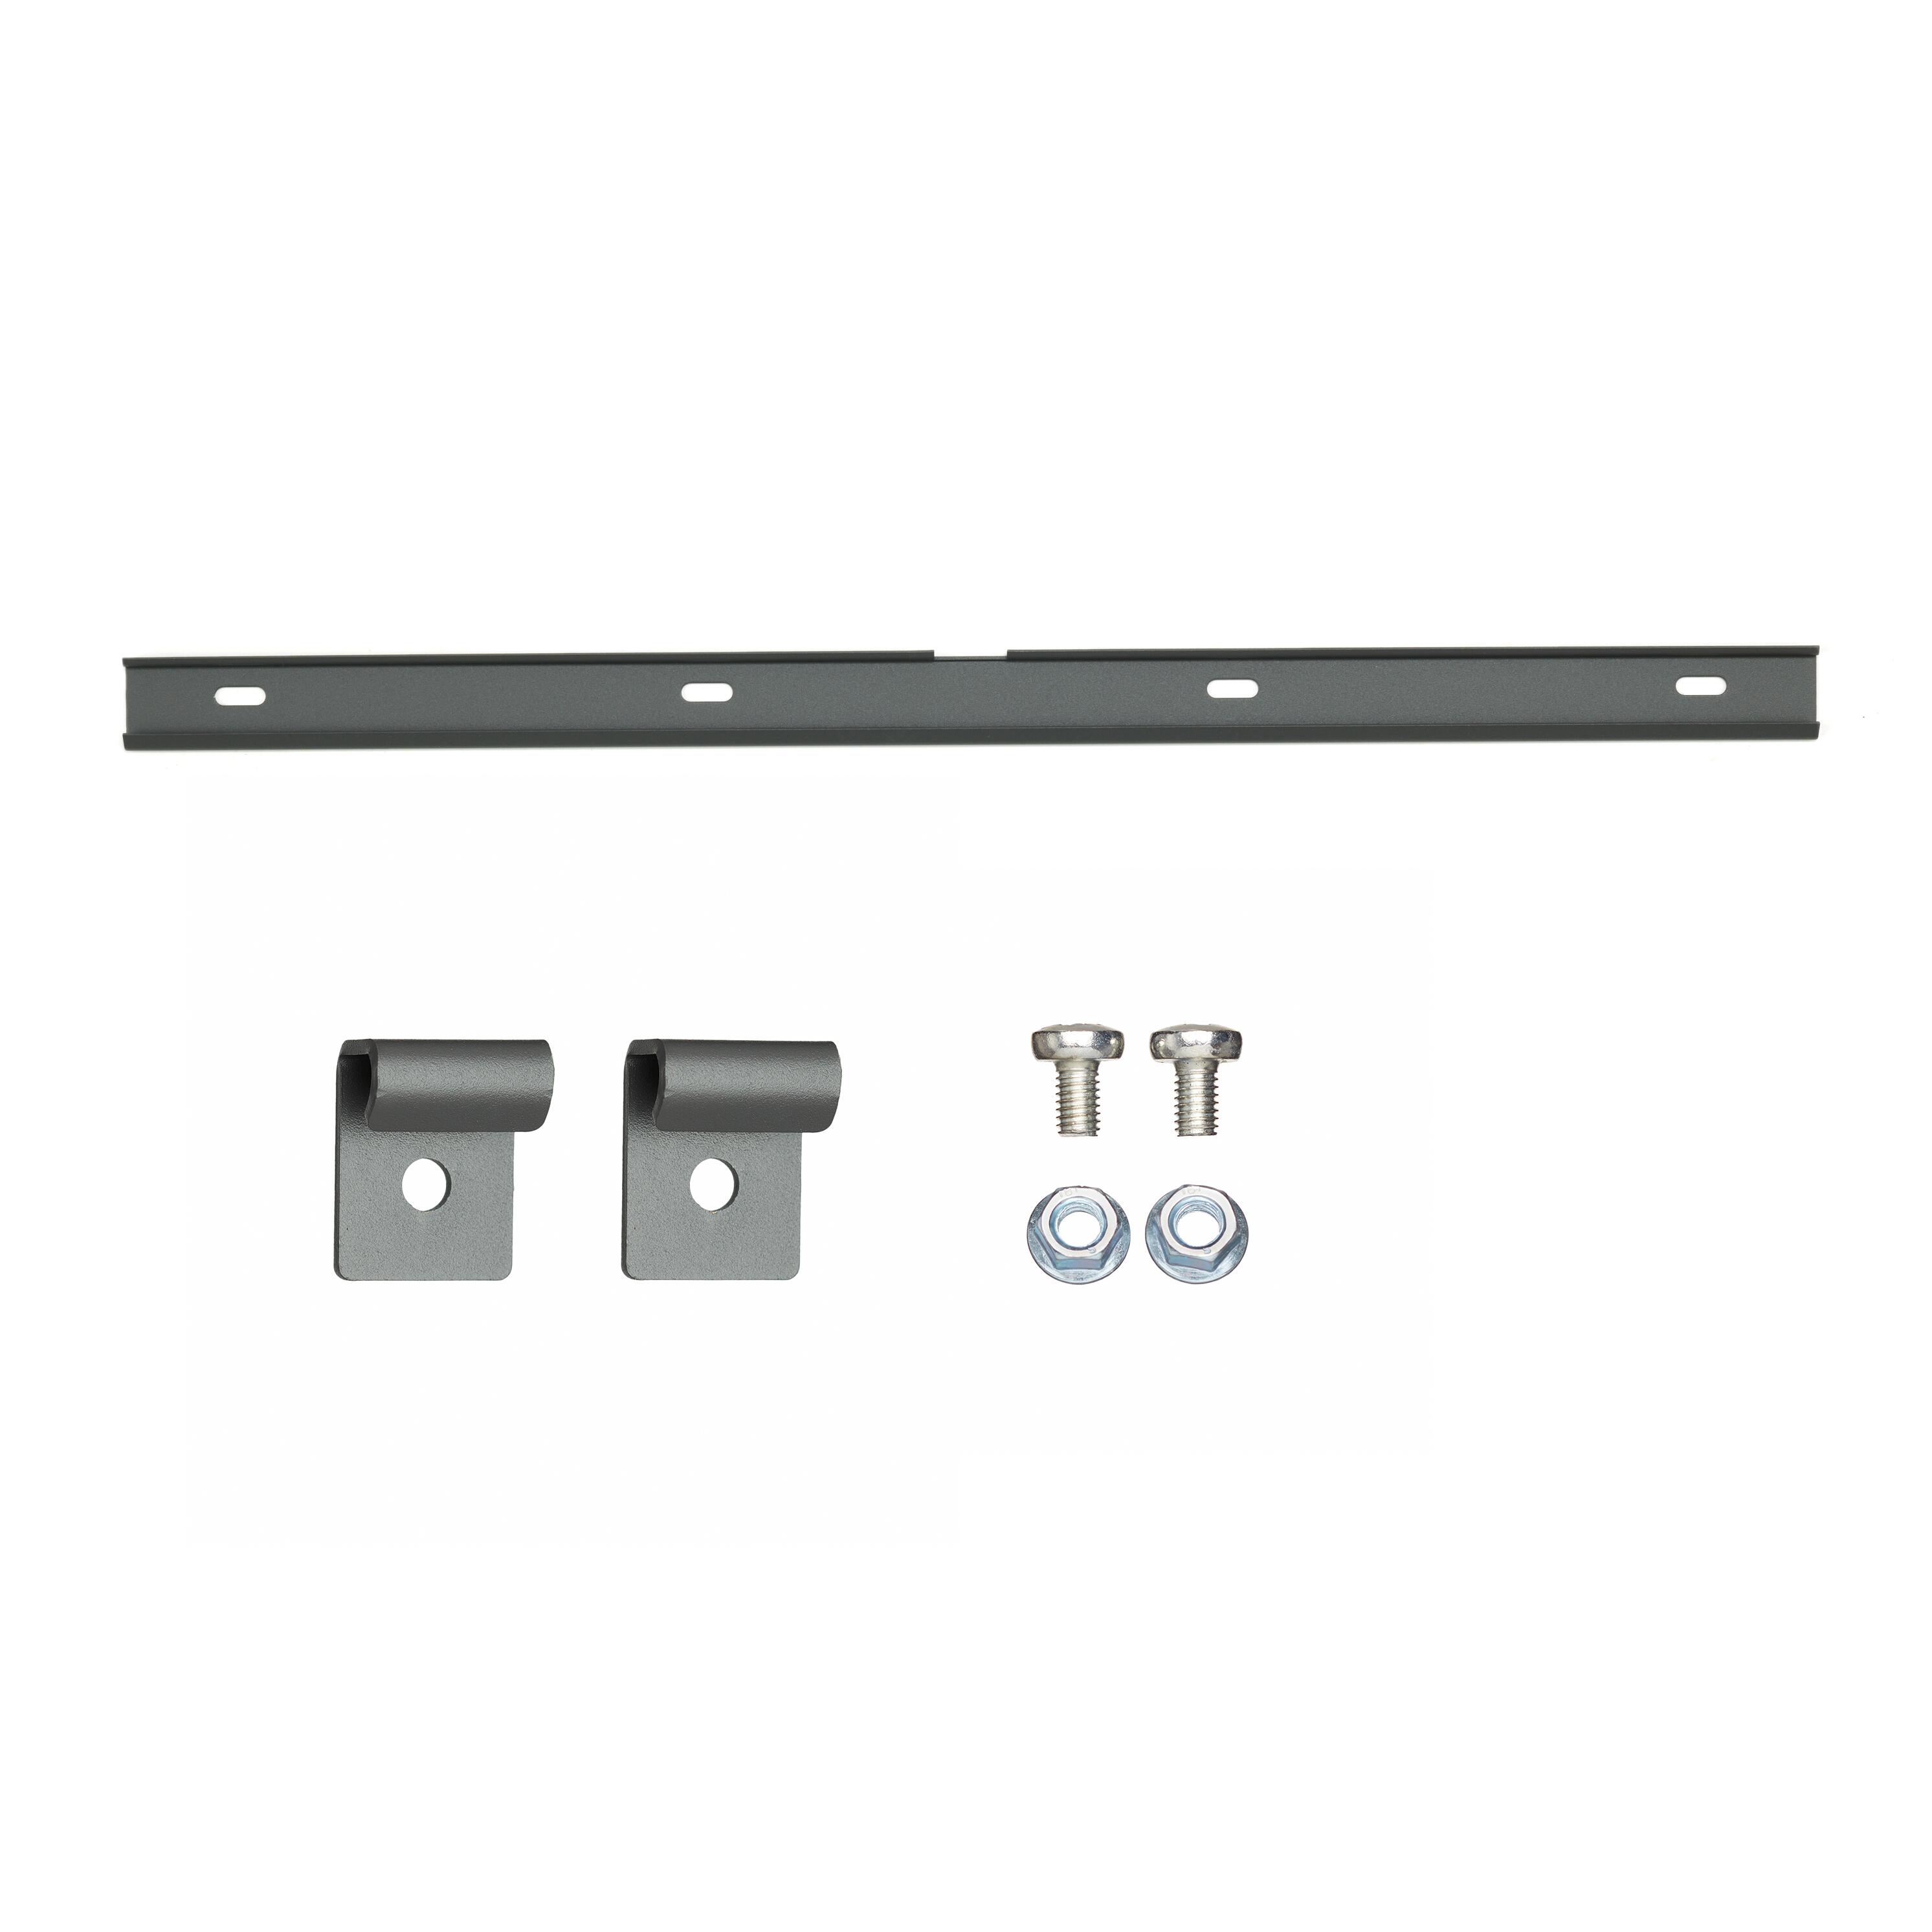
1. Measurement: Level the mounting rail with a bubble level and mark the drill holes. (If installing multiple cabinets: leave at least a 5" / 127 mm gap).
2. Wall Rail: Fasten the rail to the wall using hardware suitable for your wall type.
3. Wall Brackets: Align and attach 2 wall brackets to the cabinet's back panel using 2 screws and nuts.
4. Securing: Hang the cabinet on the rail and screw it into the wall (use hollow-wall anchors/toggles if you are not hitting a stud).
Interior and Doors
Shelving: Insert the shelf supports into the inner rows of holes. Angle the shelves in and press down to lock them in place.
Cable Covers: Install the rear cover and the 2 side covers for lighting cables (must be installed even if LED lighting is not used).
Doors: Snap the hinges into the mounting plates inside the cabinet. Start with the bottom pin, then the top pin.
Finish: Attach the handles with screws.
Elevate your storage with the robust steel Upper cabinet featuring corner protection in PP-plastic. Mount it easily in Garage+ standards or mount directly onto the wall using the Garage+ upper cabinet wall-mounting kit. This kit contains frame, cabinet doors and a shelf for a versatile and organized space.
A comprehensive upper cabinet kit, including frame, doors and a shelf for an organized space., Robust steel construction with PP-plastic corner protection., Can be mounted on Garage+ standards or directly onto the wall.
Color
Size
Width: 605 mm Depth: 348 mm
<
Select size
Width (mm): 605
Depth (mm): 348
Height: 709
369,30
Specification
<
Specification
Elevate your storage with the robust steel Upper cabinet featuring corner protection in PP-plastic. Mount it easily in Garage+ standards or mount directly onto the wall using the Garage+ upper cabinet wall-mounting kit. This kit contains frame, cabinet doors and a shelf for a versatile and organized space.
A kit for creating an upper cabinet. Mounts in a Garage+ standard or directly on the wall using mounting kit.
The package includes cabinet frame, doors and a shelf.
Components in high-quality steel.
Safety and care
<
Safety and care
Safety
Note! Do not place Elfa products in direct contact with water.
Care
Wipe clean with a cloth dampered with a mild cleaner. Wipe dry with a clean cloth.
Assembly Instructions
<
Assembly Instructions
IMPORTANT: This cabinet must always be properly anchored to the wall to prevent accidents, either via the Elfa system or directly into wall studs. Always ensure that your screws and wall anchors are appropriate for your specific wall type (drywall, concrete, or wood).
Before you begin: Ensure all hardware is included. Find a flat surface for assembly where you will not damage the cabinet or the floor (we recommend assembling on a rug or the cardboard box the cabinet was delivered in).
Choose Installation Method:
A. Elfa System: Top track + Hang standards.
Note: The standards must be placed with an exact 600 mm (23 5/8") CC-measurement (center to center). Secure the standards through the top holes so they cannot be lifted or slide.
B. Direct Wall Mounting: Using a separate Cabinet Wall Mounting Kit.
Assembling the Frame (Common for both methods)
Step 1: Side Panels: Screw the left and right side panels to the cabinet bottom using 2 screws (B).
Step 2: Lower Corner Protectors: Place corner protectors BL (left) and BR (right) on the side panels and secure with 2 screws (B). Note the direction of the notches.
Step 3: Back Panel: Place the back panel on the unit and attach it to the top edge of the side panels using 2 screws (C).
Step 4: Cabinet Top: Stand the unit up. Position the corner brackets under the cabinet top (verify the notch direction in the brackets) and place the top onto the unit.
Step 5: Upper Corner Protectors: Install corner protectors TL (left) and TR (right) on the cabinet top using 2 screws (B).
Step 6: Locking: Lay the cabinet down with the back facing up. Secure the back panel and the top firmly with 6 screws (C).
Step 7: Final Details: Stand the cabinet up. Press 4 hole plugs (D) into the top and bottom. Screw the door stops (A) into both the top and bottom.
Choose Your Mounting Method:
Option A: Mounting with Elfa System (Hanging Standards)
1. Brackets: Press the left and right mounting brackets into the side panels and secure them to the back panel with 2 screws (E). The hooks should protrude through the back of the cabinet.
2. Standards: Ensure that the hang standards are fully secured to the wall before mounting.
3. Hanging: Lift the cabinet and tilt the hooks into the inner slots of the hang standards.
Option B: Direct Wall Mounting
1. Measurement: Level the mounting rail with a bubble level and mark the drill holes. (If installing multiple cabinets: leave at least a 5" / 127 mm gap).
2. Wall Rail: Fasten the rail to the wall using hardware suitable for your wall type.
3. Wall Brackets: Align and attach 2 wall brackets to the cabinet's back panel using 2 screws and nuts.
4. Securing: Hang the cabinet on the rail and screw it into the wall (use hollow-wall anchors/toggles if you are not hitting a stud).
Interior and Doors
Shelving: Insert the shelf supports into the inner rows of holes. Angle the shelves in and press down to lock them in place.
Cable Covers: Install the rear cover and the 2 side covers for lighting cables (must be installed even if LED lighting is not used).
Doors: Snap the hinges into the mounting plates inside the cabinet. Start with the bottom pin, then the top pin.
Finish: Attach the handles with screws.